You can enable the Busy on-premise connector by enabling the integration from the ‘Integrations’ page on the RootFi Dashboard. To begin using the Busy Integration:
- Navigate to the ‘Integrations’ section.
- Toggle the button to enable the Busy integration.
- Navigate to the ‘Companies’ section and click ‘Connect a Company’.
- Name your user’s company and an invite link will be generated.
- Copy and share the generated URL with your customer to integrate your user’s Busy platform with RootFi.
-
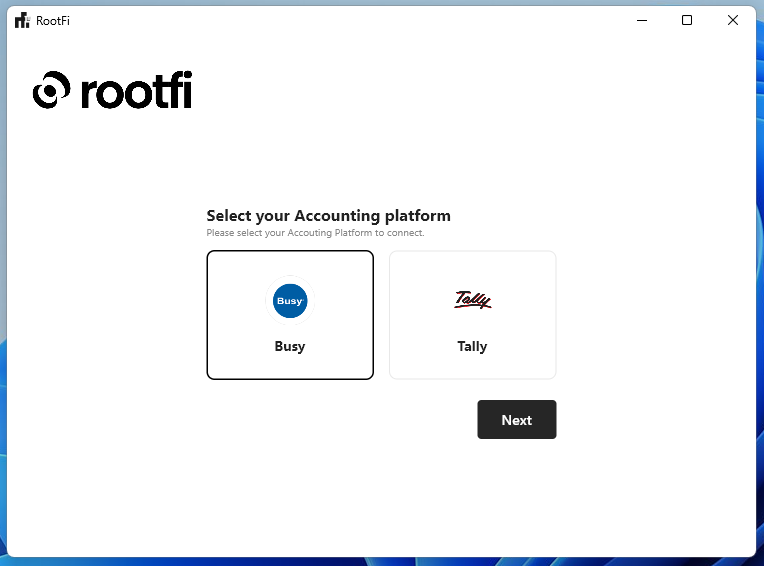
Firstly, the user needs to select Busy Integration on the screen.
-
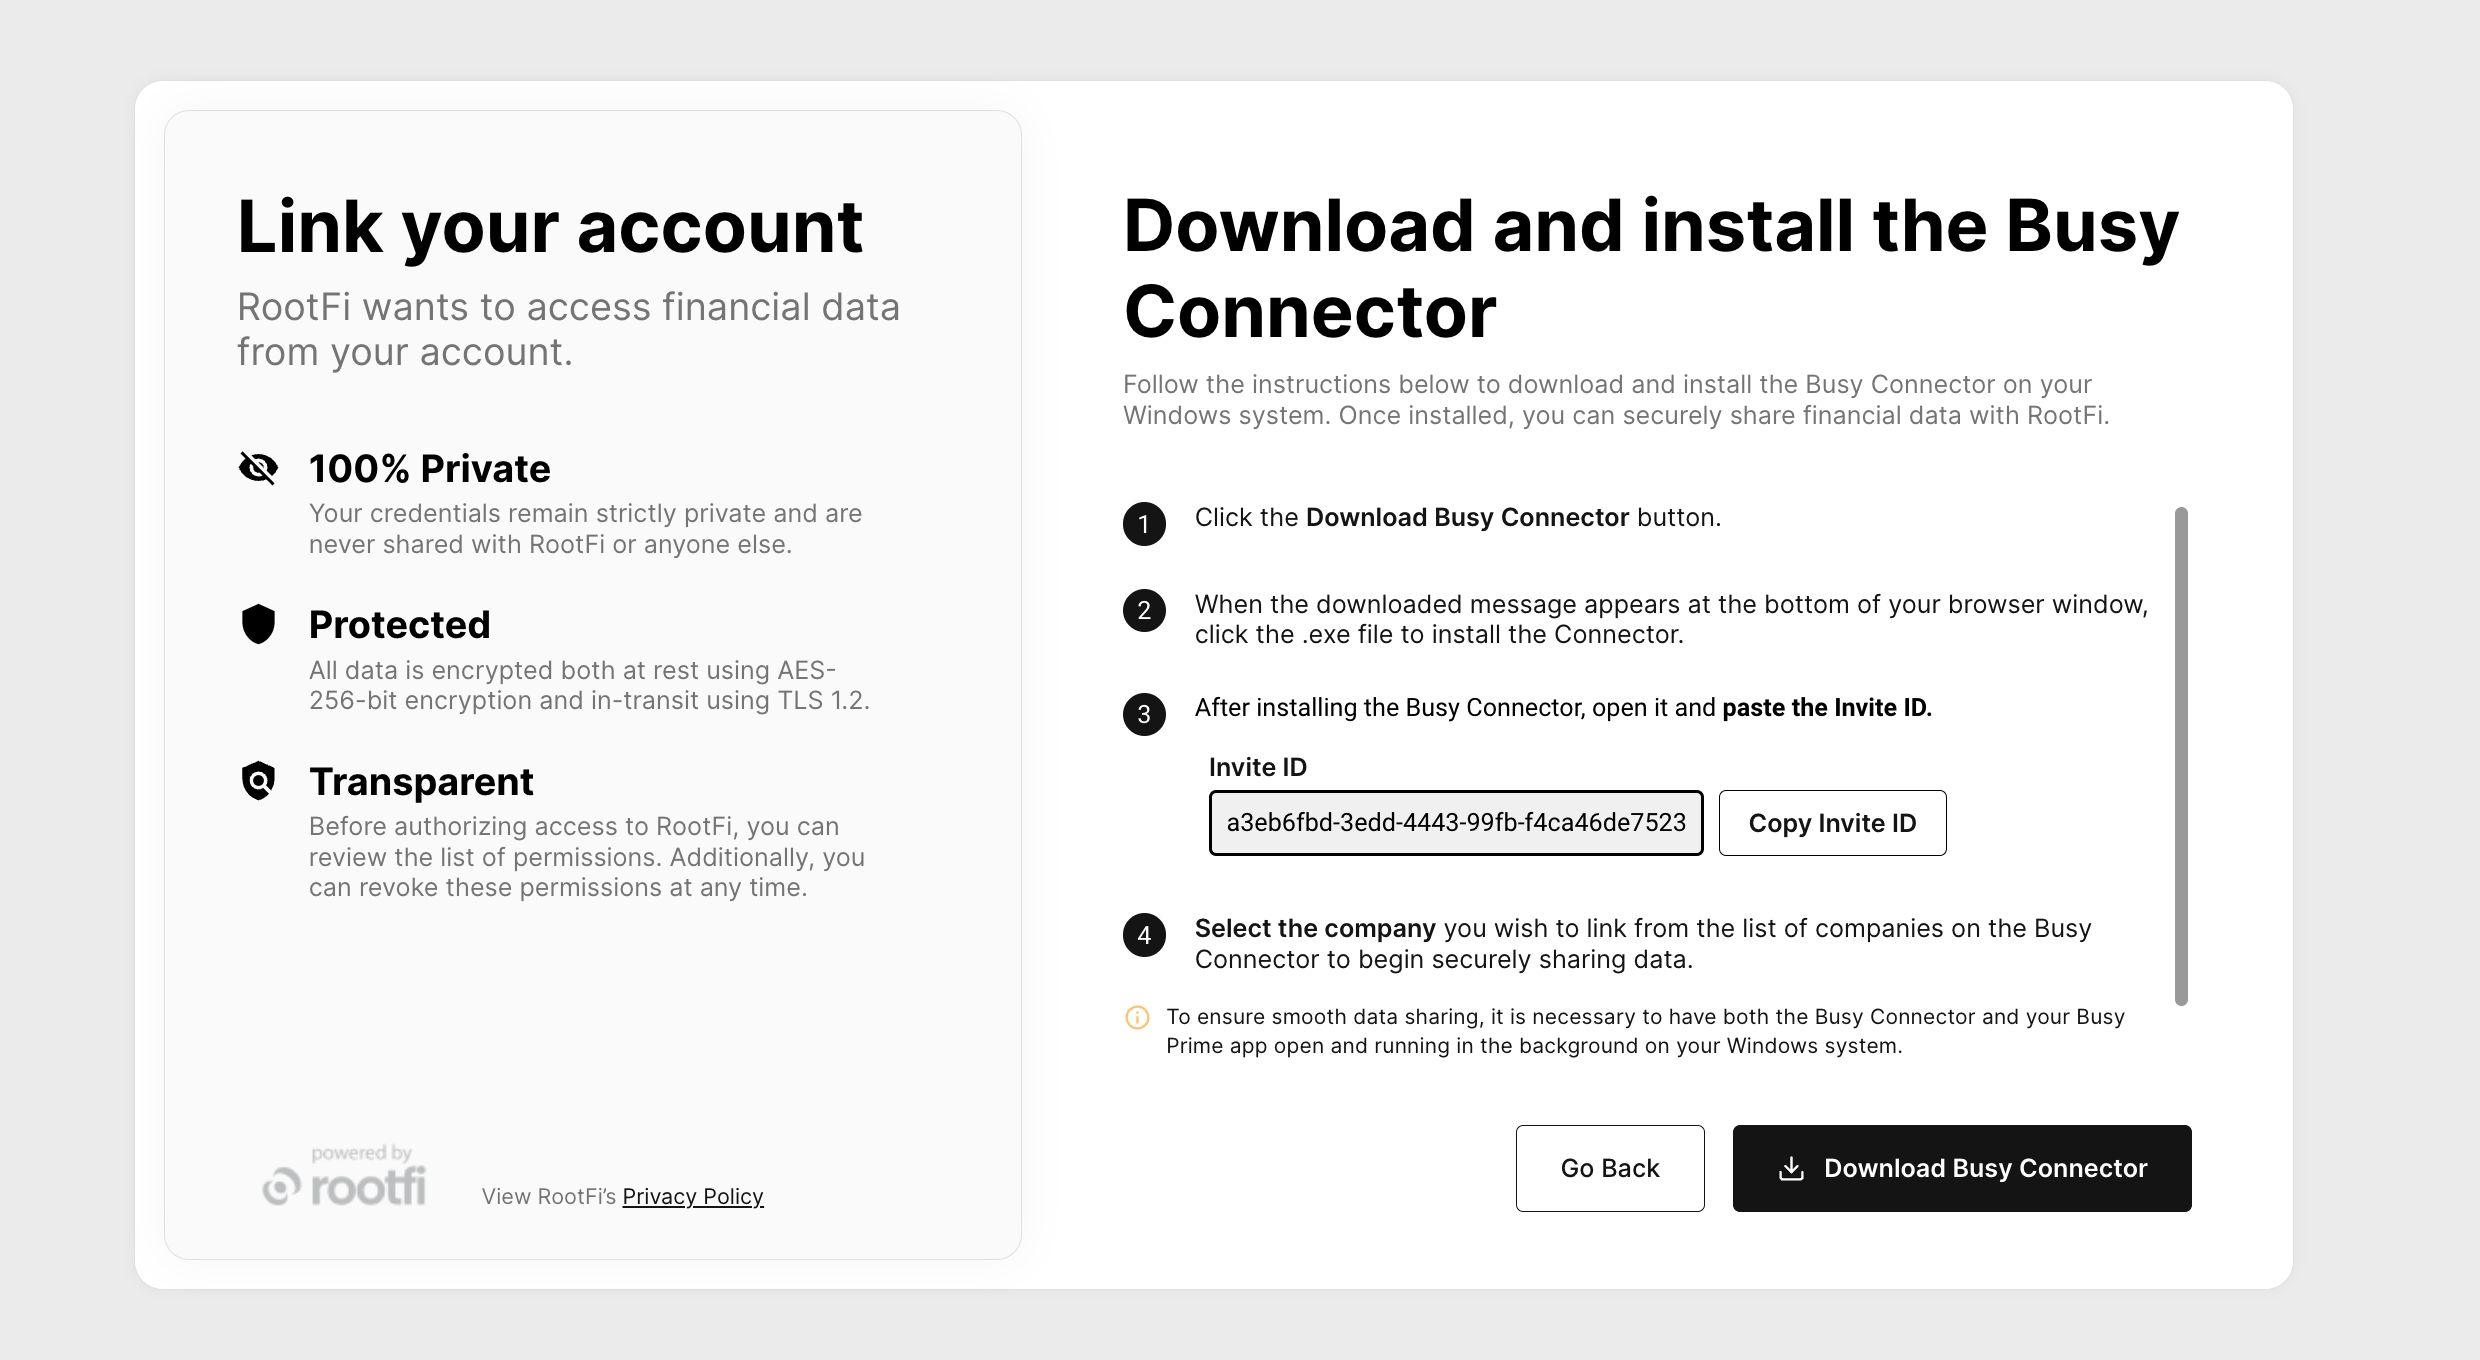
Secondly, the user needs to copy and paste the Invite ID from the RootFi Connect Link or Connect SDK and click on ‘Next’ to proceed to the next step.

-
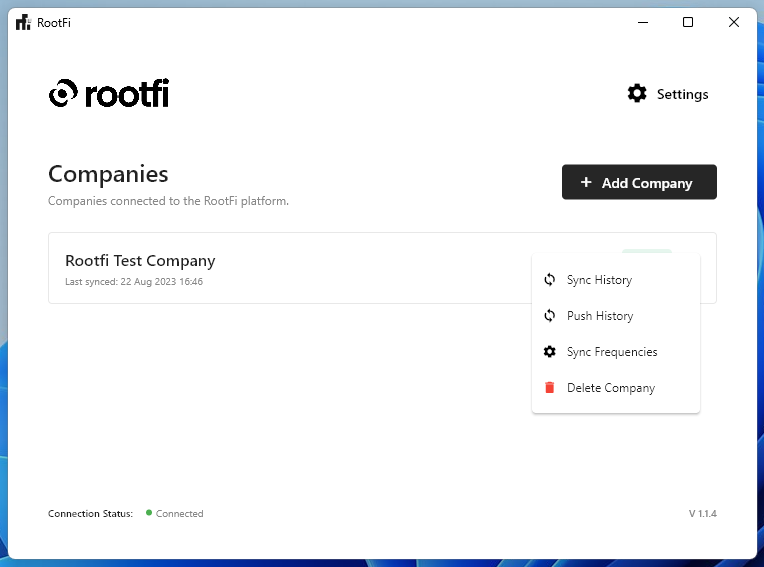
In the next step, the user needs to select the company for syncing from the list of companies that are displayed and then click on ‘Next’.

The companies displayed are the companies open in the background in the Busy application.
- Once the user selects the desired company, the syncing process will commence and the user will be able to view the connected company on the Companies screen of the Busy on-premise connector.
Linking companies using the Busy on-premise connectorThe Busy on-premise connector must be run on the same computer as the Busy application. Advise your user to install the connector on the computer they normally use when working with the Busy application.Before beginning the syncing process, it is important that the user first opens the Busy application and logs in to the specific company they wish to link. This is a critical step as it establishes the necessary connection between the Busy application and the on-premise connector, enabling seamless transfer of financial data between the two platforms.
Supported EnvironmentsOur Busy on-premise connector is specifically designed to operate in single-tenant environments. This means that only one Windows user can log on to a particular computer, which is also used to access the Busy application.